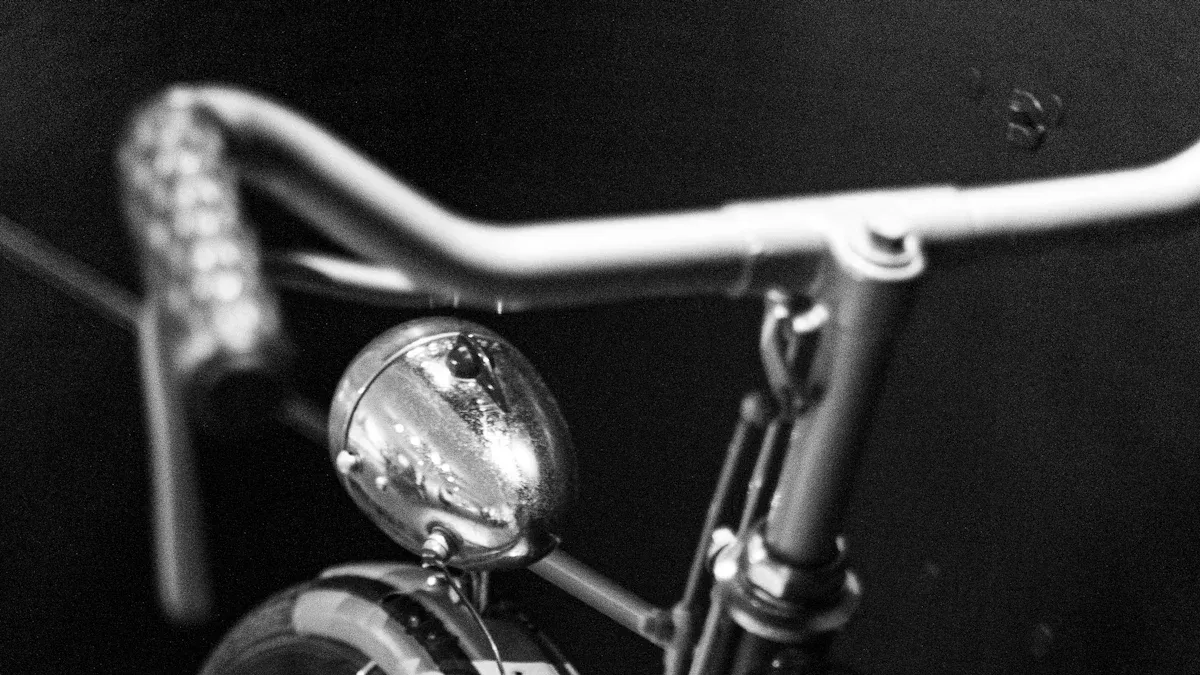
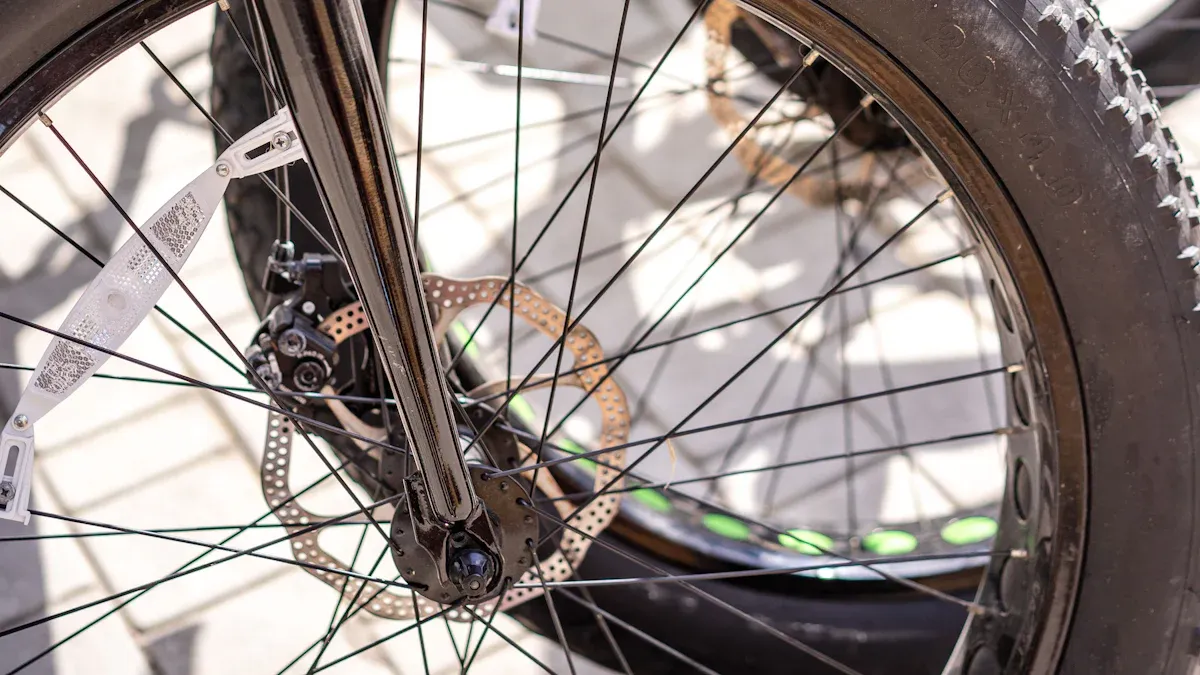
Do you know that feeling when you are completely covered in filth after a ride? With a mountain bike with mudguards, your clothing stays much cleaner. The mudguard catches mud, water, and small stones before they hit you.
Tip: If you often ride through puddles or on muddy trails, a mudguard is particularly worthwhile. You can simply keep riding without constantly thinking about wet socks or a dirty back. Your bike also stays clean for longer, which means less work when cleaning.
Benefits for rider and bike
A mountain bike with mudguards protects not only you but also your bicycle.
The chain and drivetrain pick up less dirt.
The brakes stay free of mud.
Bearings and seals last longer because less water penetrates.
You save time and money because you have to replace parts less often. Your riding comfort increases. You can focus on the trail instead of the next wash.
Note: A mudguard is particularly practical if you ride to school or work regularly. With the right protection, you stay dry and your bike runs better.
Mudguard types and materials
U-profile, clip-on mudguards & cable ties
You have many options when looking for a suitable mudguard. Clip-on mudguards are particularly popular. You can easily attach them to the frame or fork. You often don't need any tools. Clip them on, align them, and you are ready for the next tour. U-profile mudguards offer you all-around protection. They enclose the wheel almost completely. This is practical if you often ride in bad weather. Installation takes a little longer, but the protection is worth it. Cable ties are true all-rounders. You use them to attach small mudguards directly to the fork or rear triangle. This is quick and holds securely. Clip-on mudguards and cable ties are great if you want to flexibly adapt your mountain bike with mudguards.
Tip: Clip-on mudguards are ideal for quick use. You can easily remove them when needed.
Special MTB and E-bike mudguards
There are special mudguards for mountain bikes and e-bikes. They are often wider and longer, providing better protection against spray and mud. Many models adapt to suspension and thick tires. You can find mudguards made of various materials. Each material has its own advantages:
Material
Characteristics
Stainless steel
Rustproof, stiff, best protection, heavy, complex installation.
Aluminum
Lightweight, variable in shape, modern, can be integrated with lights and racks.
Plastic
Affordable, easy to install, available in various shapes, more break-proof with aluminum reinforcement.
Carbon
Very light, expensive, exclusive finish, caution with crashes due to splintering.
Wood
Expensive, complex to manufacture, sensitive to weather depending on finish.
Plastic is the most common. It is easy to install and comes in many shapes. Aluminum looks modern and is light. Stainless steel lasts a long time but is heavy. Carbon is super light but expensive. Wood is rare and more for enthusiasts.
Choosing the right mudguards
Compatibility with frame and tires
Do you want your mudguard to fit your bike perfectly? Then you should pay attention to a few important things. The right combination ensures that you and your bike are optimally protected. Here are the most important criteria to consider:
Wheel size and tire width: Your mudguard must match the size and width of your tires. This is the only way it can effectively block spray water.
Mounting options on the frame: Check whether your frame has threaded eyelets or other attachment points. This simplifies installation and ensures a secure hold.
Material and quality: Think about whether you prefer a flexible plastic mudguard or a robust aluminum model. Both variants have their advantages.
Tip: Measure your tire width precisely. The mudguard should be at least 1 cm wider than the tire. This keeps everything clean even when cornering.
Tip: Measure your tire width precisely. The mudguard should be at least 1 cm wider than the tire. This keeps everything clean even when cornering.
Width, length, and coverage area
The size of your mudguard determines how much protection you actually get. A model that is too narrow or too short lets dirt and water pass by easily. Therefore, pay attention to the following points:
The width of the mudguard should always be slightly larger than your tire width. This keeps your back dry even when riding through deep puddles.
The distance between tire and mudguard should be about 1.5 cm. This prevents dirt from getting stuck or the mudguard from rubbing.
For off-road use, we recommend wide and long fenders. They offer you the best protection even on muddy trails.
A long spray guard on the rear wheel not only keeps your clothes clean but also protects the technology of your bike, such as brakes and the drivetrain.
Here is a small overview of what you should watch out for:
MTB type
Recommended mudguard width
Features
Trail/All-Mountain
60-75 mm
Good coverage, flexibly mountable
Enduro/Downhill
75-90 mm
Extra wide, robust spray protection
Cross-Country
50-65 mm
Lightweight, sufficient for dry paths
Note: If you often ride in mud, a mountain bike with mudguards that extend below the bottom bracket is worthwhile. This keeps the chainstay clean too.
Selection based on riding style and conditions
Not everyone rides the same way. Your riding style and the conditions on your trails determine which mudguard suits you best.
Are you often on technical trails? Then you need robust enduro mudguards. They hold up even during fast descents and jumps.
For mixed terrain, a model like schlamm:PE is suitable. It protects you reliably, whether it's dry or muddy.
Do you often ride on muddy trails? Then grab an XL guard like kol:oss. This guarantees your back stays dry.
For quick installation without tools, the rit:ze L is ideal. You can attach and remove it easily.
The weather also plays a major role. In frequent rain or mud, you should go for particularly stable and long mudguards. They not only protect you but also extend the life of your bike parts. For dry conditions, a lighter model is often sufficient.
Tip: Think about where and how you ride the most before buying. This way you will find the perfect mudguard for your bike and riding style.
Before you get started, you should prepare a few things. This will save you time and nerves later. First, take a close look at your bike. Measure the tire width and check if the mudguards actually fit. Manufacturers often state a maximum width, for example, 40 mm for 28-inch wheels. Read the mudguard manufacturer's instructions so you don't miss any important steps. Choose the appropriate material for installation.
You can also use cable ties or Velcro straps. These are practical if you don't have special attachment points on the frame. Have everything ready before you start. This makes installation much more relaxed.
Tip: Before buying, check whether your bike has the necessary attachment points. This makes installation easier and ensures a firm hold.
Front and rear installation
Now down to business! Installation differs depending on the mudguard and position on the bike. Front and rear mudguards require different attachment points.
Attach it to the eyelets using screws or cable ties.
Make sure the mudguard is centered and does not rub against the tire.
Tighten the screws or cable ties, but not too hard, to avoid damage to the frame.
Do you want it even easier? You can often install clip-on mudguards without any tools at all. Here's how:
Take cable ties and attach the mudguard to the seat stays.
Cut a piece of PP film to size and pre-bend it with a heat gun.
Make sure the film has notches at the ends so the cable ties hold better.
Check that everything is stable and nothing wobbles.
Note: Clip-on mudguards are great if you want to be quick and flexible. You can easily remove them when needed.
Fine-tuning and inspection
After installation comes the fine-tuning. You want everything to sit perfectly and function well. Check the attachment points on the bike to ensure the mudguards are correctly installed. Only trim protruding wire struts after you have checked tire clearance. This prevents anything from rubbing or stones getting jammed.
Ensure that the mudguard is a few millimeters wider than the tire. An overhang of half a centimeter on both sides protects you better. With knobby tires, you should leave at least one centimeter of distance to the mudguard, which leaves room for stones and mud.
You can stick a protective film between the mudguard and the frame to protect the paint and make it look better.
See if the mudguards actually block dirt and water.
Tip: If everything stays clean after the test ride and nothing rubs, you did everything right. Now you are ready for the next tour – no matter how muddy the trail gets!
Avoiding errors & tips
Common installation errors
Do you want your mudguard to sit correctly? Then you should avoid typical errors. Many problems arise when you do the installation too quickly or overlook important steps. Here are the most common pitfalls:
You mounted the mudguard too close to the tire, so it rubs on every ride.
The bottom bracket is blocked because the mudguard is incorrectly positioned. A quick test ride would have shown you this immediately.
The drivetrain is not working properly because you didn't test it after installation.
You didn't check the attachment points, and the mudguard wobbles or comes loose while riding.
Tip: Always take a test ride after installation. Test the drivetrain and check if the mudguard rubs or gets in the way anywhere. This way you will recognize errors immediately.
Practical tips for a secure hold
Do you want your mudguard to stay secure even on rough trails? With a few tricks, everything will be rock solid. Take a look at these tips:
Choose the right hole size for plastic rivets. 5 mm usually fits better than 6 mm.
Opt for a model that fits snugly against the frame. This keeps everything stable, even when you're riding over roots.
Tighten all screws and cable ties evenly. This distributes the pressure and prevents anything from breaking off.
Tip
Benefit
Rubberized Velcro straps
Secure hold, no slipping
Correct hole size
Tight fit of rivets
Suitable model
Less movement, more protection
🚴♂️ With these tips, your mudguard will be secure, and you can fully focus on the ride!
Care and maintenance
Cleaning and inspection
Do you want your mudguard to last a long time and provide reliable protection? Then you should clean and check it regularly. After a long ride, you will often see mud and dirt on the mudguard. This can impair its function. A thorough cleaning is especially worthwhile after riding in the rain or on muddy trails. For e-mountain bikes, weekly maintenance is recommended, especially after excursions through sand, snow, or mud.
Clean your mudguard after every long ride.
Check the mounting points after rain or mud.
For e-mountain bikes: Clean weekly, especially after riding in bad weather.
You can simply use a damp cloth or a soft brush. Make sure that no stones or branches are stuck between the mudguard and the tire. This keeps everything secure and prevents scratches on the frame.
Tip: A quick check after every tour saves you a lot of work later and keeps your bike fit for the next adventure!
Replacement and repair
Sometimes cleaning is no longer enough. Is your mudguard damaged or no longer sitting correctly? Then you can replace it without any problems. Make sure that the new model fits your bike and that the correct mounting options are available. Use the old mudguard as a template to determine the measurements.
Small cracks can often be repaired with tape or cable ties. For larger damage, it is worth getting a new mudguard. This ensures your mountain bike is always well protected.
🚲 With regular maintenance and quick replacement, you are always safe on the road!
Do you want to protect your mountain bike optimally? Then follow these steps:
Measure your tire and shoulder width.
Choose the right mudguard and the correct handlebar.
Install everything securely and check the fit.
Now you are ready for your next adventure – with a clean bike and lots of fun! 🚴♂️
FAQ
How do I find the right mudguard for my mountain bike?
First, you measure your tire width. Then check if your frame has mounting points. This is how you quickly find the right model for your bike.
Can I install mudguards myself?
Sure! You usually only need cable ties or screws. The instructions will help you. You can even attach clip-on mudguards without tools. Just give it a try! 🚴♂️
Do I have to clean mudguards regularly?
Yes, it's worth it. Wipe off the dirt after every tour. This way, your mudguard stays stable for a long time and protects you reliably.
Share
Hochleistungs-Hecknabenmotor mit präzisem Drehmomentsensor
Bis zu 40 Nm Kraft: Meistern Sie auch steile Anstiege spielend leicht.
Intelligente Sensorik: Der fortschrittliche Drehmomentsensor erkennt Ihre Tretkraft millimetergenau und unterstützt Sie stufenlos und kraftvoll.
Effizientes Hinterradantriebssystem: Direkte Kraftübertragung für ein dynamisches Fahrgefühl.
Integrierte Fahrradbeleuchtung mit kraftvollem 85 LUX Licht
Helle 85 LUX Ausleuchtung: Garantiert exzellente Sicht und maximale Sichtbarkeit bei Nacht oder in der Dämmerung.
K-Mark Zertifiziert: Erfüllt die strengen deutschen Straßenverkehrszulassungsvorschriften - rechtssicher und verkehrstauglich.
Optimal integriert: Fahrradspezifisches Design für perfekte Montage und aerodynamische Passform ohne störende Kabel oder Nachrüstteile.
Zuverlässige Sicherheit: Erhöht Ihre passive Sicherheit im Straßenverkehr durch kontinuierlich zuverlässige Beleuchtung.
Hochwertige Zellentechnologie für langlebige Leistung
Kompakte 360 Wh Power: Leicht zu transportieren, bietet aber Energie für lange Fahrten oder mehrtägige Touren.
Nahtlos integriert: Perfekt auf Ihr Fahrrad abgestimmtes Design - optisch ansprechend und aerodynamisch optimiert.
Sorgenfreies Laden: Intelligentes Batteriemanagementsystem schützt vor Überladung, Tiefentladung und Überhitzung für maximale Sicherheit und Langlebigkeit.
Premium-Zellen: Hochwertige Lithium-Ionen-Zellen garantieren hohe Energiedichte, Zuverlässigkeit und viele Ladezyklen.
Professionelle Schaltperformance für maximale Fahrrad-Vielfalt
Meistern Sie jedes Terrain: Shimano DEORE 10-Gang-Schaltung
Shimano DEORE Zuverlässigkeit: Vertrauen Sie auf die Qualität und Langlebigkeit der weltweit führenden Fahrradkomponenten-Marke.
Präzises 10-fach Schalten: Wechseln Sie mühelos und exakt zwischen den Gängen – ideal für steile Anstiege, schnelle Abfahrten und lange Strecken.
Erweiterter Nutzungsbereich: Die breite Übersetzungsbandbreite passt sich optimal jedem Gelände und Ihrer gewünschten Tretfrequenz an.
Wartungsarme Performance: DEORE-Technologie für reibungslose, verlässliche Schaltvorgänge bei jedem Wetter und auf jedem Untergrund.
Sicherheit durch Selbstjustierung: Hydraulische Scheibenbremsen
Hydraulische Präzision: Kraftvolle Bremskraft durch geschlossenes Ölsystem – auch bei Nässe, Kälte oder Verschmutzung. Selbstjustierend: Automatischer Verschleißausgleich für konstant optimale Bremsleistung – ohne manuelles Nachstellen, auch bei intensiver Nutzung. Zuverlässige Sicherheit: Kurze Bremswege und konstante Bremskraft für maximale Kontrolle und Vertrauen in jeder Situation. Robust & langlebig: Hochwertige Komponenten und wetterfeste Konstruktion für dauerhafte Performance bei minimalem Wartungsaufwand. (Optional: Geprüft nach TÜV/ISO 4210)
Minimalistisch & aerodynamisch mit Carbon-Rahmen und -Gabel
Leichtes Fahrvergnügen: Nur 16 kg
Fahrzeug Nur 16 kg Leichtgewicht: Einfacher zu bewegen, transportieren und manövrieren – mehr Agilität und weniger Kraftaufwand.
Hochwertiges Carbon: Carbon-Rahmen und -Gabel bieten hervorragende Steifigkeit, geringes Gewicht und vibrationabsorbierende Eigenschaften für ein komfortables Fahrgefühl.
Minimalistisches Premium-Design: Reduziert auf das Wesentliche – elegant, funktional und aerodynamisch optimiert.
Wendig und agil: Das geringe Gewicht und die präzise Steuerung durch Carbon machen jedes Fahrmanöver leicht und intuitiv.
Präzise verarbeitete Details für ein makelloses Gesamtbild
Zeitlose Eleganz: Minimalistisch & klare Linien
Reduzierte Ästhetik: Konzentration auf das Wesentliche – klare Formen und Linien schaffen zeitlose Schönheit und Ruhe.
Hochwertige Verarbeitung: Sorgfältig geglättete Oberflächen und nahtlose Übergänge für eine makellose Optik und Haptik.
Funktionales Design: Jedes Detail dient einem Zweck – optimale Ergonomie und intuitive Bedienbarkeit.
Premium-Eindruck: Die perfekte Symbiose aus minimalistischer Form und herausragender Handwerkskunst vermittelt höchste Wertigkeit.
Leichtgängige Leistung & nahtlose Schaltvorgänge
Sanftes Fahren: Shimano 7-Gang-Nabenschaltung
Shimano Nabentechnologie: Vertrauen Sie auf die Zuverlässigkeit und Langlebigkeit des weltweit führenden Herstellers für Fahrradkomponenten.
Präzise 7-Gang-Schaltung: Einfache und intuitive Bedienung für müheloses Schalten in jeder Situation – ob am Berg oder in der Stadt.
Nahtloser Wechsel: Ruckfreies Schalten auch unter Last für einen gleichmäßigen Trittrhythmus und maximalen Fahrkomfort.
Robust & wartungsarm: Geschlossenes System für zuverlässige Performance bei jedem Wetter und minimale Wartungsanforderungen.
Großzügige Energie, nahtlos integriert & einfach zu laden
Mehr Freiheit: Tragbare 468-Wh-Batterie & perfekte Integration
Kompakte 468-Wh-Power: Ausreichend Energie für lange Ausflüge oder mehrtägige Touren, dabei leicht zu transportieren und auszutauschen.
Nahtlos integriert: Fahrradspezifisches Design für optimale Passform, elegante Optik und aerodynamische Effizienz.
Schnell & einfach aufladen: Unkompliziertes Ladesystem für maximale Flexibilität – zu Hause oder unterwegs.
Robuste Zuverlässigkeit: Hochwertige Lithium-Ionen-Zellen und Schutz vor Witterungseinflüssen für langlebige Performance.
Hochleistungs-Mittelmotor mit 70 Nm Drehmoment
Kraftvoll bergauf: 70 Nm Mittelmotor
Kraftvollster Antrieb: 70 Nm Drehmoment für müheloses Bewältigen auch steilster Steigungen – pure Power beim Bergauffahren.
Optimale Gewichtsverteilung: Der zentral positionierte Mittelmotor sorgt für ausgewogene Fahrdynamik, bessere Traktion und ein natürliches Fahrgefühl.
Effiziente Kraftübertragung: Direkter Kraftschluss an der Tretkurbel für maximale Effizienz und spürbar mehr Vortrieb bei jedem Tritt.
Ideale Bergunterstützung: Der Drehmomentsensor erkennt präzise Ihre Tretkraft und liefert kraftvoll,angepasste Unterstützung genau dann, wenn Sie sie am meisten brauchen.
Sicherheit durch Selbstjustierung: Hydraulische Scheibenbremsen
Hydraulische Präzision: Kraftvolle Bremskraft durch geschlossenes Ölsystem – auch bei Nässe, Kälte oder Verschmutzung.
Zuverlässige Sicherheit: Kurze Bremswege und konstante Bremskraft für maximale Kontrolle und Vertrauen in jeder Situation.
Robust & langlebig: Hochwertige Komponenten und wetterfeste Konstruktion für dauerhafte Performance bei minimalem Wartungsaufwand.
Das universelle Schnellmontage-System für Ihr Fahrrad
Flexibel beladen: MIK-Gepäckträger – Sekunden für Auf & Ab
MIK-Standardkompatibel: Passt für die meisten Fahrräder mit MIK-Aufnahme – einfach aufstecken, drehen, fertig!
Sekundenschnell montiert & demontiert: Ideal für flexible Nutzung – ob Gepäcktasche, Kindersitz oder Einkaufskorb. Immer griffbereit oder platzsparend verstaut.
Robust & stabil: Hochwertige Materialien für sichere Lasten bis zu 25 kg.
Sicheres Handling: Verriegelungsmechanismus für festen Halt während der Fahrt und einfaches Lösen im Stand.
310% Schaltbereich · Drehregler für stufenlose Gangwahl
Wartungsfreie Nabenschaltung
SANFT WIE EIN RADIOKNOF – INTUITIV BEDIENBAR, DAUERHAFT WARTUNGSFREI:
• Perfekte Gangwahl bei jeder Steigung
• Kein Schaltrucken
• Allwettertauglich durch geschlossenes System
75 NM DURCHZUGSKRAFT · SCHWANKUNGSFREI
HOCHTORQUIE-ANTRIEB
LEISTUNGSSTARK UND STABIL – PRÄZISE KRAFTENTFALTUNG IN JEDER SITUATION
• Gleichmäßige Beschleunigung selbst unter Volllast
• 75 Nm Drehmoment für müheloses Bewältigen auch steilster Steigungen – pure Power beim Bergauffahren
2900mA · 14,5Ah/522Wh PRÄZISIONSELEKTROCHEMIE
HOCHENERGIEDICHTE-BATTERIETECHNIK Maximale Reichweite: 135 Km
LEISTUNGSSTABILITÄT MIT SYSTEM – DAUERHAFTE ENERGIEBEREITSTELLUNG
• CAN-Protokoll-Steuerung: Zellüberwachung · Temperaturmanagement & Cell monitoring · Thermal protection
• 135+ km Reichweite pro Vollzyklus (ECO-Modus)
• 2000+ Ladezyklen bei 80% Kapazitätserhalt
• Zuverlässiger Tiefentladeschutz & optimales Thermomanagement
• -10°C bis +55°C Allwetter-Einsatzfähigkeit
Sicherheit durch Selbstjustierung: Hydraulische Scheibenbremsen
Hydraulische Präzision: Kraftvolle Bremskraft durch geschlossenes Ölsystem – auch bei Nässe, Kälte oder Verschmutzung. Selbstjustierend: Automatischer Verschleißausgleich für konstant optimale Bremsleistung – ohne manuelles Nachstellen, auch bei intensiver Nutzung. Zuverlässige Sicherheit: Kurze Bremswege und konstante Bremskraft für maximale Kontrolle und Vertrauen in jeder Situation. Robust & langlebig: Hochwertige Komponenten und wetterfeste Konstruktion für dauerhafte Performance bei minimalem Wartungsaufwand. (Optional: Geprüft nach TÜV/ISO 4210)
Das universelle Schnellmontage-System für Ihr Fahrrad
Flexibel beladen: MIK-Gepäckträger – Sekunden für Auf & Ab
MIK-Standardkompatibel: Passt für die meisten Fahrräder mit MIK-Aufnahme – einfach aufstecken, drehen, fertig!
Sekundenschnell montiert & demontiert: Ideal für flexible Nutzung – ob Gepäcktasche, Kindersitz oder Einkaufskorb. Immer griffbereit oder platzsparend verstaut.
Robust & stabil: Hochwertige Materialien für sichere Lasten bis zu 25 kg.
Sicheres Handling: Verriegelungsmechanismus für festen Halt während der Fahrt und einfaches Lösen im Stand.
KOMFORT AUF KOPFSTEINPFLASTER – PRÄZISE DÄMPFUNG IN JEDEM TERRAIN
• 85% Stöße reduzieren durch Coil-Sprung/Dämpfer-System
• Reaktionszeit ≤0.15s bei High-Frequency Vibration
• Staub- & Wasserschutz Nordsee-Klima
• Patentiertes Komfort-Curve-Federprofil
E-Bike-Lenker mit enviolo HD Stufenlosgetriebe
Der funktionsreiche gebogene Lenker verfügt über einen 60° verstellbaren Vorbau, LCD-Display, rutschfeste Ledergriffe, Frontlicht sowie Vorder- und Hinterbremshebel. Ausgestattet mit dem zuverlässigen enviolo HD Stufenlosgetriebe.
⚠️ Wichtiger Hinweis: Verstellen Sie den enviolo-Schalter nur während der Fahrt. Schalten im Stillstand kann das Getriebe beschädigen.
REX Commuter S - Der clevere Einstieg in die urbane Mobilität
Mit hochwertigen Komponenten für eine entspannte und saubere Fahrt durch die Stadt.
Shimano Steps E5000 Mittelmotor
Reichweite bis 160 km
Gates Carbon Riemen
Schwalbe Big Ben Reifen
Leistungsstarker Mittelmotor für sanfte, sofortige Unterstützung in der Stadt.
Der Shimano Steps E5000 Mittelmotor (250 W, 40 Nm) unterstützt dich sofort an Ampeln und leichten Steigungen
Nahtloses Schalten – auch im Stand. Wartungsfrei für die Stadt.
Die Shimano Nexus 7-Gang Nabenschaltung ist ideal für den urbanen Alltag.
Weit kommen. Sicher ankommen.
Der semi-integrierte 14‑Ah‑Akku erreicht eine Reichweite von bis zu 160 km pro Ladung.
Die Schwalbe Big Ben Reifen (50 mm) bieten optimalen Pannenschutz.
Sanfte Kraft - ohne Wartungsstress.
Unser Riemenantrieb läuft leise, sauber und langlebig (2–3x länger als Kette). Keine Flecken, leicht, modern und geschmeidig.
Integriertes Rahmenschloss serienmäßig verbaut – Kein zusätzliches Schloss erforderlich
Unser integriertes Schloss ist sauber am Hinterbau montiert und harmoniert perfekt mit den kompletten Schutzblechen sowie dem Gepäckträger.