
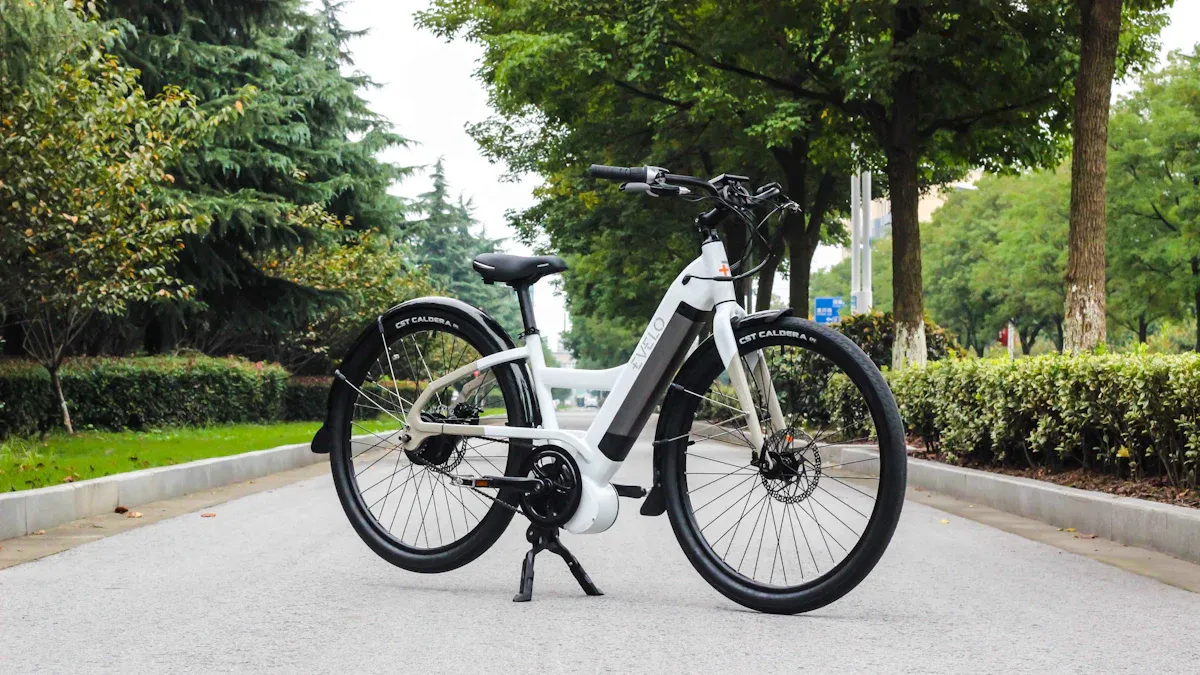
You can electrify your bicycle in just a few steps using an e-bike conversion kit. Almost any bicycle can be converted if you check for compatibility. Many people choose this solution. In 2020, 1.95 million electric bicycles were sold in Germany, an increase of 43 percent over the previous year. With a conversion kit, you save money, protect the environment, and customize your bike exactly as you wish.
Key takeaways
With an e-bike conversion kit, you can easily and affordably turn your normal bicycle into an e-bike.
Choose the right motor and battery that suit your bike and riding style to get the best riding experience.
Before converting, check your bike's compatibility and pay attention to safety, especially regarding brakes and the frame.
Converting protects the environment, saves money compared to buying a new bike, and offers you many options for customization.
Regular maintenance and checks ensure that your converted e-bike remains safe and reliable for a long time.
What is an e-bike conversion kit?
Function
An e-bike conversion kit transforms your normal bicycle into a modern e-bike. You install key components such as the motor, battery, and electronics onto your bike. The motor assists you while pedaling, making cycling easier, especially on inclines or against headwinds. A battery provides the necessary power. A display and control unit allow you to adjust the assistance level and view important ride data. Sensors measure your pedaling effort and adjust the motor power accordingly.
Tip: Ensure your bike is in good technical condition. Strong brakes are important because you will be traveling faster with motor assistance.
Installation requires some technical skill. You secure the components to the frame and connect them with cables. After the conversion, check that everything is working and safe. An e-bike conversion kit offers you the opportunity to customize your bike and improve your riding experience.
Variants
There are different types of e-bike conversion kits, which primarily differ based on the position of the motor:
Variant |
Motor position |
Power (Watts) |
Special features |
|---|---|---|---|
Mid-drive motor |
Bottom bracket |
Good balance, quiet, more expensive |
|
Rear hub motor |
Rear wheel |
250 |
Popular, direct power, recuperation |
Front hub motor |
Front wheel |
250 |
Easy to install, cheaper |
Mid-drive motor: You get good balance and a natural riding feel. The motor is located at the bottom bracket. This variant is often more expensive but very efficient.
Rear hub motor: The motor is located on the rear wheel. You feel direct power transmission. Many users like the harmonious riding experience.
Front hub motor: The motor is located on the front wheel. Installation is usually simple. This variant is well-suited for city riding.
Each variant has its own advantages. Consider which one best suits your bicycle and riding habits.
Advantages
Sustainability
By converting your bicycle, you make an important contribution to environmental protection. If you use your bike instead of your car more often, you significantly reduce your CO2 emissions. A 2021 study by the University of Oxford shows that you can save about 3.2 kilograms of carbon dioxide with just one bike ride per week. This corresponds to a car trip of around ten kilometers. Companies are increasingly turning to converted bicycles and cargo bikes. These vehicles are eco-friendly and can even keep up with small delivery vans, making sustainable mobility possible in everyday life.
Tip: Use your converted bike for short trips in the city. You not only save emissions but also time in traffic.
Costs
An e-bike conversion kit is often cheaper than buying a new e-bike. You can keep using your existing bicycle and don't need to purchase a new one. Prices for conversion kits generally start at around 300 to 800 euros. A new e-bike often costs significantly more. You save real money and can use your budget for accessories or maintenance.
No high purchase costs for a new bike
Lower running costs due to less wear and tear
Ability to specifically upgrade with high-quality components
Individuality
With a conversion kit, you design your bicycle entirely according to your wishes. You choose the motor, battery, and accessories yourself. This allows you to tailor the technology to your needs. Perhaps you want a particularly lightweight bike for the city or a powerful system for steep routes. You decide how much assistance you need and what your bike should look like.
Every conversion is unique. You determine how your e-bike ultimately looks and functions.
Compatibility
Bicycle types
Not every bicycle is suitable for an e-bike conversion kit. You should first check what type you have. Compatibility depends on several factors. Frame material, geometry, braking system, and gear system are particularly important.
A sturdy frame supports the additional weight of the motor and battery. An old or damaged frame can quickly reach its limits.
Mid-drive motors go well with sporty bicycles. They ensure a natural riding feel and distribute the weight evenly. You can use them with derailleur or hub gears. Some models even work with coaster brakes.
Rear hub motors are suitable for bicycles with derailleur gears. They shift the center of gravity to the rear and run quietly. Coaster brakes are usually not possible here.
Front hub motors are easy to install and fit many types of bicycles. However, they affect steering behavior, especially on lightweight bikes.
Modern disc brakes offer more safety. Many retrofit kits are not compatible with coaster brakes.
Tip: Always check the brakes and the condition of your bicycle before installing a conversion kit. Safety comes first!
Technical requirements
You must adhere to certain technical standards so that your converted bicycle remains safe and legal. The EN 15194 standard defines the requirements a pedelec must meet.
The motor must have a maximum output of 250 watts and provide assistance only up to 25 km/h.
Your bike needs a functional lighting system, reflectors, and a bell.
Modern braking systems such as disc brakes are important because they grip better at higher speeds.
Regularly check brakes, drivetrain, tires, and electronics for wear.
Store and handle the battery properly to extend its life and avoid risks.
After the conversion, you should perform all safety checks. This is the only way to avoid accidents and legal problems.
An e-bike conversion kit offers you many possibilities, but you must carefully check the technical requirements. This ensures your bike remains safe and you enjoy your new e-bike for a long time.
Components
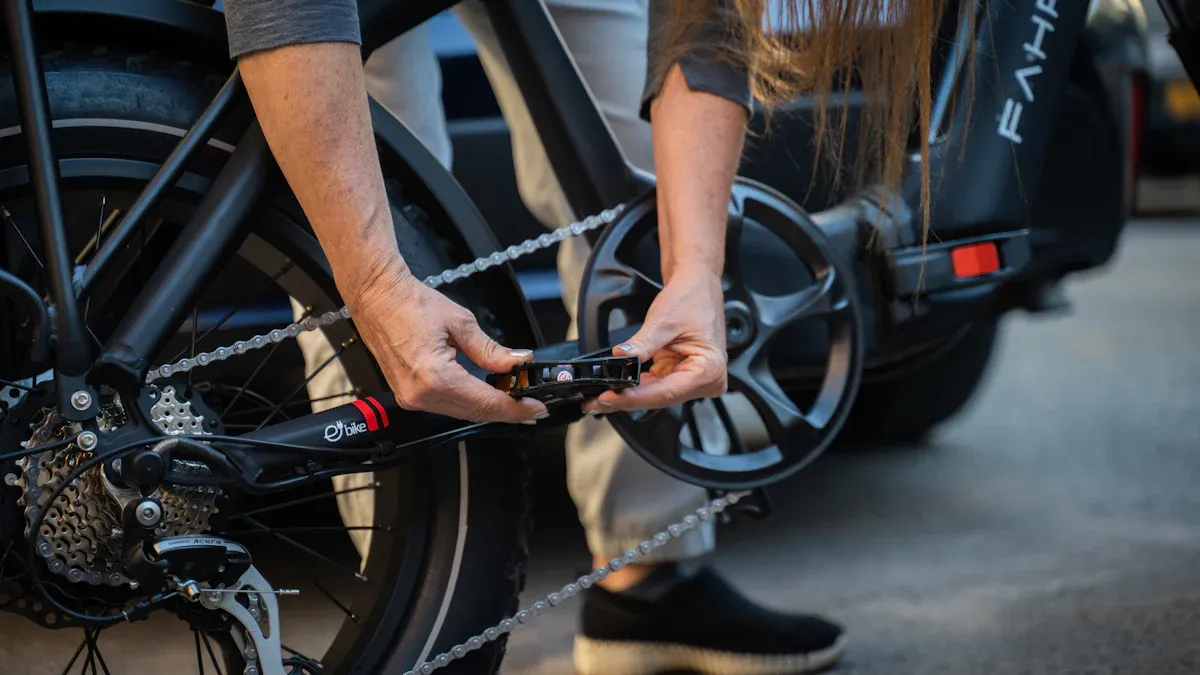
An e-bike conversion kit consists of several important parts. You should know the individual components to make the right choice for your bicycle.
Motor types
The motor is the heart of your conversion kit. There are different types of motors, which differ in installation, riding feel, and technology:
Mid-drive motor: This motor is located at the bottom bracket. You feel a very natural riding sensation because the motor acts directly on the crank. Installation and removal are technically demanding. The power is a maximum of 250 watts, and assistance ends at 25 km/h.
Hub motor: You can find it either in the front or rear wheel. Installation is usually easier. Hub motors are the most common choice and are often supplied with a pedal sensor, display, and brake sensor.
Friction drive motor: This motor is compact and lightweight. It provides torques of about 40 to 60 Nm and power outputs around 230 to 250 watts. Proper contact pressure is important for the motor to last a long time.
Feature |
Puma front wheel motor |
Puma CST rear wheel motor |
|---|---|---|
Top speed |
25 km/h |
25 km/h |
Climbing ability |
very good |
very good |
Installation time |
approx. 4 hours |
approx. 4 hours |
Motor weight |
4.0 kg |
4.2 kg |
Continuous rated power |
250 W |
250 W |
Voltage |
36 V |
36 V |
Design |
Geared motor with freewheel |
Geared motor with freewheel |
Installation width |
100 mm |
138 mm |
Brake disc mount |
yes |
yes |
Control method |
Pedal cadence |
Pedal cadence |
Tip: Consider which motor position best suits your riding style. A mid-drive motor provides balance, a rear hub motor provides direct power, and a front hub motor allows for easy installation.
Battery
The battery provides the motor with energy. Most conversion kits use lithium-ion batteries. They offer a voltage of 36 or 48 volts and capacities of 10 to 20 Ah. Charging time is about 5 to 7 hours. With a full battery, you can achieve a range of 15 to 30 kilometers, depending on the route and riding style. A modern battery lasts for over 1000 charge cycles and up to 5 years. Many batteries have protective features such as overvoltage or short-circuit protection. You can find them on various types of bicycles such as mountain bikes, folding bikes, or cargo bikes.
Display & Controls
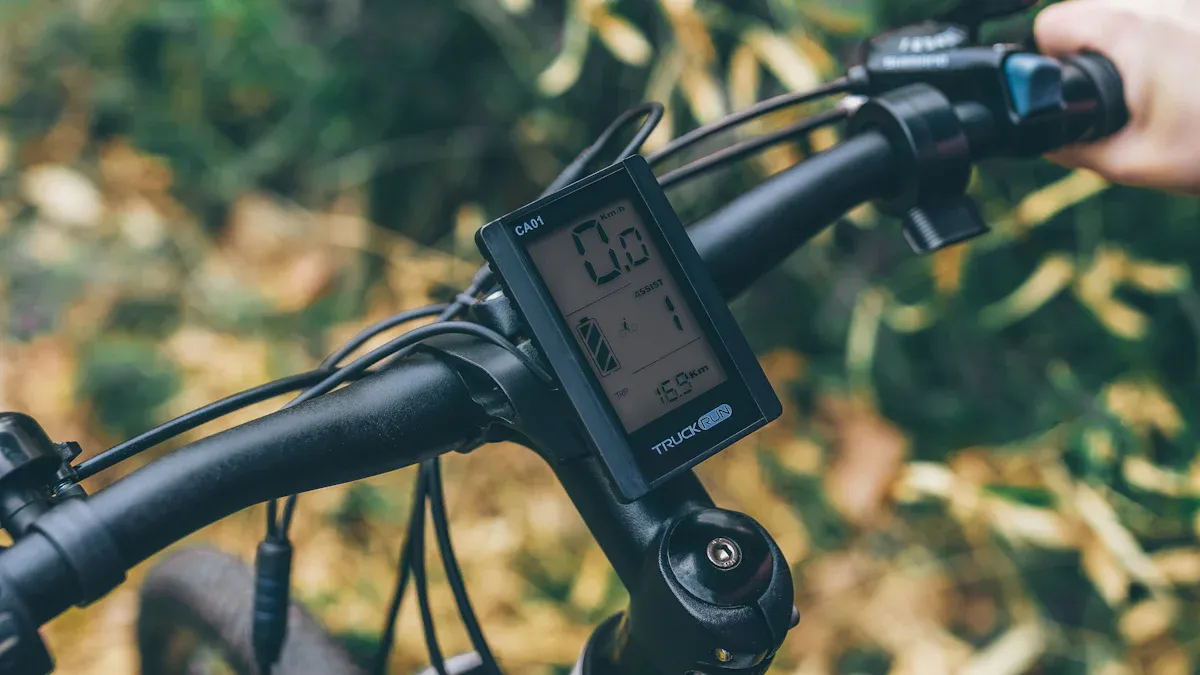
The display shows you important ride data such as speed, mileage, battery level, and assistance level. Using the control unit, you choose how strongly the motor should assist you. Many systems offer different display sizes and colors. Some displays can even connect to your smartphone. You can adjust settings and install updates. The control unit is a central element for individually regulating motor power.
Sensors & Accessories
Sensors measure how hard you are pedaling. Simple pedal cadence sensors detect movement, while torque sensors measure the actual force applied. They ensure that the motor optimizes assistance. Accessories such as brake sensors, lighting systems, or special mounts make your e-bike safer and more comfortable. Manufacturers recommend choosing as many components as possible from a single source to avoid compatibility issues.
Conversion instructions
Preparation
Good preparation is the key to a successful conversion. You should first clean your bicycle thoroughly and check for damage. Pay special attention to the frame, brakes, and gears. A sturdy frame better supports the additional weight of the motor and battery. Check if your bicycle is compatible with the chosen conversion kit. Many manufacturers provide precise specifications regarding frame width, brake system, and gearing.
Have all necessary tools ready. You will usually need Allen keys, screwdrivers, a torque wrench, pliers, and possibly a chain tool. Read the manufacturer's instructions carefully. Mark the most important steps. A tidy workspace helps you keep track of things.
Tip: If you have little experience with bicycle technology, get help from a specialist workshop or an experienced friend. This helps you avoid mistakes and save time.
Installation
Start by removing old components if necessary. For example, remove the front or rear wheel if you want to install a hub motor. Install the motor according to the instructions and ensure it is properly aligned. Securely attach the battery to the frame or rack. Route the cables neatly and protect them from water and dirt. Mount the display on the handlebars and connect it to the controller. Attach sensors such as pedal or brake sensors in the designated locations.
Tighten all bolts to the correct torque. Check that the motor runs freely and no parts are rubbing. Proper installation of the motor, battery, and electronics is crucial for the stability and safety of your bicycle. Test reports show that carefully fastening all components improves functionality and durability. TÜV experts recommend paying particular attention to the stability of the frame and the compatibility of the conversion kit. This is the only way to ensure your bicycle remains safe and reliable.
Attention: Work step by step and check the function after each step. Errors during installation can lead to damage or accidents.
Commissioning
After installation comes commissioning. Charge the battery fully. Switch on the system and check if the display shows all values correctly. Test the assistance levels and check if the motor starts up smoothly. Check the brakes, lights, and electronics. Take a test ride on safe terrain. Watch out for unusual noises or malfunctions.
Thorough testing after installation is important. It helps you identify installation errors or faults early on. Many test reports recommend testing the converted e-bike extensively. This ensures that all safety-relevant components like brakes, drive, and lighting function perfectly. Adhering to legal requirements ensures that your e-bike remains roadworthy.
Tip: Carry out regular maintenance. Check the brakes, battery, and electronics. This keeps your e-bike safe and reliable for a long time.
With an e-bike conversion kit, you can transform your bicycle into a modern e-bike step by step. Choosing the right tools and having a good technical understanding will help you carry out the conversion safely and successfully.
Costs & Comparison
Conversion kit prices
Prices for a conversion kit vary greatly. You can find simple sets starting from around 200 euros. High-quality systems with a powerful battery and display cost up to 1,500 euros. Most complete sets are between 900 and 1,500 euros. In this price range, you get a motor, battery, controller, and often the necessary accessories. Conversion kits are particularly popular with mountain bikers and hobbyists because they offer flexibility and customization. The following table shows you some examples:
Conversion Kit |
Price (approx.) |
Motor Power |
Battery Capacity |
Special Features |
|---|---|---|---|---|
Pendix Edrive 300 |
1,649 Euros |
250 Watts |
330 Wh |
Premium mid-drive motor, quiet, range up to 50 km |
Livall PikaBoost |
299 Dollars |
Rear-wheel drive |
234 Wh |
Tool-free installation, regenerative system |
Bafang BBs-01B |
530 Euros + 270 Euros battery |
250 Watts |
- |
Powerful mid-drive motor, LCD on-board computer |
Bikight SW900 |
approx. 400 Euros (with battery) |
250 Watts |
- |
Good price-performance ratio, 35 Nm torque |
Yose Power |
approx. 200 Euros |
250 Watts |
Battery included |
Complete set, installation up to 3 hours |
Tip: An affordable conversion kit may be enough for starters. For longer distances or more power, a high-quality set is worth the investment.
Additional expenses
In addition to the conversion kit, there are other costs. You might need special tools or need to upgrade parts like brakes or tires. If you don't do the conversion yourself, a workshop usually charges between 100 and 300 euros for the installation. Spare parts like batteries or displays cost extra. Regular maintenance and care also add up. Plan for these expenses so you don't have any surprises.
Comparison with buying new
A conversion is often cheaper than buying a new e-bike. Especially if you already own a good bicycle, you save a lot of money. For example, a new drive for a trekking bike costs about 1,300 euros. A new trekking e-bike is around 3,000 euros. You keep using your familiar bike and save resources. Market analyses show that conversion kits can technically keep up with mass-produced e-bikes. You are not tied to a single manufacturer and can perform many repairs yourself.
However, there are also disadvantages. The conversion takes time and technical knowledge. With cheap bicycles, an expensive conversion kit can even be more expensive than a simple new e-bike. Warranty and service are often better when buying new. New e-bikes offer perfectly tuned technology and comprehensive service. Consider what is more important to you: saving money and staying flexible, or enjoying comfort and a warranty.
Legal
Regulations
You must observe certain regulations when converting your bicycle into an e-bike. In Germany, the motor may provide a maximum of 250 watts of power. Motor assistance ends at 25 km/h. As soon as you ride faster, the motor switches off automatically. These rules apply to so-called pedelecs. This is the only way your bike remains a bicycle in the legal sense, and you do not need a driver's license.
Your converted e-bike must meet the requirements of the German Road Traffic Licensing Regulations (StVZO). This includes a functioning lighting system, reflectors, and a bell. The CE mark indicates that your system meets European safety standards. Many manufacturers provide this proof. Ensure that all components are tested and approved.
Tip: Check before the conversion if your set meets the DIN EN 15194 standard. This standard regulates the safety of e-bikes and pedelecs.
Approval
Not every converted e-bike needs individual approval. If you comply with the legal requirements, a general operating permit is usually sufficient. In the event of deviations, such as more powerful motors or higher speeds, the authority requires individual approval. In this case, a technical service like GTÜ inspects your bike. The inspection covers many points:
Inspection Requirement |
Description |
|---|---|
Type description |
Technical data and modifications are documented |
Test reports |
Proof of safety and function |
Deceleration device |
Brake inspection |
Driving dynamics |
Testing of driving characteristics |
Tamper protection |
Protection against unauthorized interference |
Lighting technology |
Inspection of lighting and reflectors |
Motor power |
Checking the maximum power |
Battery safety |
Checking for short-circuit and overvoltage protection |
For individual approval, you often need further documentation such as manufacturer certificates or test certificates. GTÜ supports you in the approval process and coordinates with the Federal Motor Transport Authority (Kraftfahrt-Bundesamt).
Insurance
As long as your e-bike meets the legal requirements, you do not need special insurance. Your bike is still considered a bicycle. A more powerful motor or higher speed turns your bike into a motor vehicle. Then you need an insurance license plate and liability insurance. If in doubt, check whether your private liability insurance covers damages caused by the e-bike.
Note: An e-bike conversion kit with more than 250 watts or assistance above 25 km/h makes your bike subject to compulsory insurance.
Maintenance & Everyday Use
Care
Regular care keeps your e-bike reliable and extends its service life. You should keep the most important parts such as the chain, shock absorbers, bicycle hub, and suspension fork clean and oiled. Start with the chain: Wipe it with a cloth to remove dirt and old grease. Avoid harsh cleaning agents. Apply special e-bike chain oil to the inside of the chain while turning the crank slowly. Make sure no oil gets onto the disc brake. After cleaning, check if the battery is properly seated and the drive is running perfectly. Once a year, you should take your bike to a specialized workshop for an inspection. If the display shows a fault, seek out a workshop promptly. Special cleaning products and accessories help make maintenance easier.
Tip: Always use products suitable for e-bikes for cleaning and care. This protects the technology and prevents damage.
Battery tips
The battery is the heart of your e-bike. Charge it regularly, but avoid deep discharge. Store the battery at room temperature and not in direct sunlight or cold. Check the contacts for cleanliness and corrosion. Use only the original charger to prevent damage. If not used for a longer period, it is recommended to store the battery half-charged. This preserves its capacity and extends its service life.
Use
In everyday life, you benefit from the ease of use of your e-bike. You can carry out many repairs yourself because most conversion kits rely on open standards. This makes replacing components from different manufacturers easier. You can perform retrofitting and maintenance quickly with standard tools. Ensure your e-bike complies with legal requirements: the motor power must not exceed 250 watts and assistance ends at 25 km/h. Choose the conversion kit to suit your intended use, for example for city traffic or longer tours. Retrofitting offers more sustainability and saves costs, because spare parts are cheaper and you don't have to rely on expensive service centers.
Note: High-quality conversion kits often offer better quality and durability than many cheap e-bikes from hardware stores.
Problems & Solutions
Sources of error
Various errors can occur when converting your bike. You should know the most common sources of error so you can avoid them. Many problems arise from sloppy installation or incorrect settings. Here you will find the most important sources of error:
Loose cable connections: Check all plugs and cables. A loose contact often leads to failures.
Incorrectly mounted sensor: The pedal sensor must be properly seated. Otherwise, the system will not recognize your movement.
Battery problems: An incompletely charged or defective battery leads to short range or sudden failures.
Faulty brakes: After conversion, the brakes sometimes no longer grip properly. Check the setting and condition.
Display shows error code: An error code often points to a problem with the motor, battery, or sensors.
Tip: Read the instructions of your conversion kit carefully. Many errors can be avoided even before installation.
Troubleshooting
You can fix many problems yourself. Proceed step by step. Use this table as a guide:
Problem |
Possible Cause |
Solution |
|---|---|---|
Motor does not run |
Cable loose, battery empty |
Check plug, charge battery |
No assistance |
Sensor incorrectly mounted |
Re-align sensor |
Short range |
Battery old, incorrect care |
Replace battery, charge correctly |
Display stays dark |
No power supply |
Check cable and battery |
Noises while riding |
Motor loose, foreign object |
Fasten motor, clean |
Attention: If you cannot find a fault yourself, visit a specialized workshop. Safety always comes first.
With a little patience and the right approach, you will solve most problems quickly. An e-bike conversion kit brings many advantages, but you should pay attention to careful maintenance.
You now have an overview of the most important steps and advantages of the conversion. With the right set, you can make your bike fit for everyday life. You save money, protect the environment, and customize your bike. Consider if the conversion is worth it for you. Many specialized retailers and online forums offer you further tips and support. Take the plunge and discover the new freedom on two wheels!
FAQ
How long does the conversion with an e-bike conversion kit take?
You usually need 3 to 5 hours for the conversion. With some experience, it goes faster. Plan enough time for preparation and checking all parts.
Can I ride my e-bike in the rain after the conversion?
Yes, you can also use your e-bike in the rain. Most conversion kits are splash-proof. However, you should check all cable connections and protect the battery from heavy water.
Do I have to take my converted e-bike to the TÜV?
You do not have to take your e-bike to the TÜV if you comply with the legal requirements. The motor may provide a maximum of 250 watts and assistance ends at 25 km/h.
What is the best way to maintain the battery?
Charge the battery regularly. Avoid deep discharge. Store it at room temperature. Use only the original charger. This extends the service life and maintains full power.
Can I install the conversion kit myself or do I need a workshop?
You can install the conversion kit yourself if you are handy. Many manufacturers provide instructions. If you are unsure, a specialized workshop will help you.