
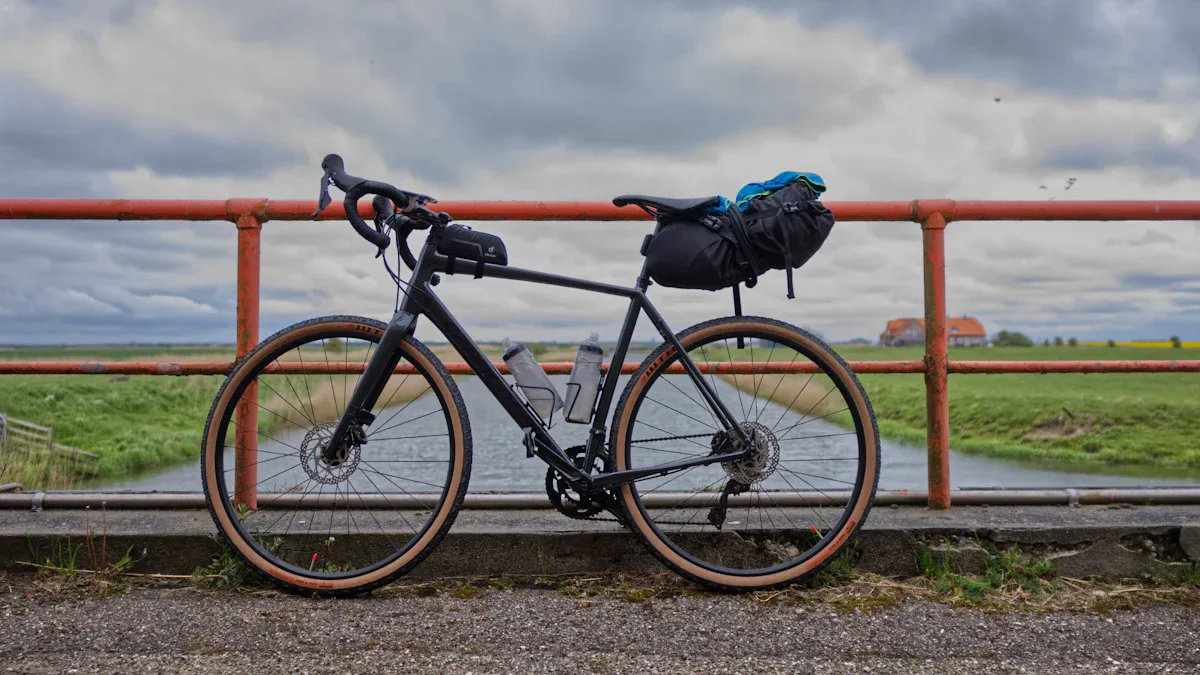
When bike packing, you organize your equipment efficiently by selecting each item purposefully and assigning it a fixed place. Planning helps you take only the essentials. Minimalism ensures less weight and more riding enjoyment. With good organization, your gear will sit stably, even on uneven paths. You will benefit from quick assembly and disassembly of the panniers. Practical tips and personal experiences make it easier for you to optimally secure your gear.
Key Findings
Choose your equipment carefully. Every gram counts in bike packing. Minimalism increases riding pleasure and reduces weight.
Pack heavy items in the frame bag. This keeps the center of gravity low and the handling stable.
Use a well-thought-out packing order. Place heavy items in the frame bag first and keep important items in the top tube bag within reach.
Create a checklist before every tour. This way, you won't forget anything and will be well-prepared.
Pay attention to theft protection. Never leave your bike unattended and use a good lock.
Bike Packing Equipment
Making a Selection
You face the choice: what should you take on your trip? Every gram counts when bike packing. You should choose your equipment so that it remains lightweight and functional. Minimalism and bike packing go hand in hand. You can only take the essentials if you want to fit everything into the bags. Nevertheless, you don't have to sacrifice comfort. Many experienced bikepackers report that a balanced setup is important. You pack as lightly as possible, but as comfortably as necessary. This saves energy on long routes and ensures that you can continue riding refreshed the next day.
Tip: Avoid unnecessary gear, but treat yourself to small extras that increase your comfort. A comfortable seat pad or a lightweight sleeping pad often make a big difference.
Your individual needs play a major role. Think about how long you will be on the road and what weather you expect. If you are planning a short tour in the city, a small selection of gear is often enough. For longer distances, you might need a stove, a tent, or special clothing. Tour planning helps you find the right balance. You should focus on the essentials and leave everything superfluous at home.
Here are important criteria for selecting your equipment:
Weight & Pack Size – The longer and steeper your tour, the more important every saved gram becomes.
Fuel Availability – In remote regions, methylated spirits (alcohol) is often easier to find than gas. In Central Europe, you can usually find gas without any problems.
Ease of Use & Stability – Consider how quickly you want to get your stove ready to use and how securely it stands on uneven ground.
Heat Output & Cooking Time – If you cook a lot or are traveling in cool regions, you need a high-performance stove.
Material & Durability – Titanium, stainless steel, or Duossal? Each material has advantages regarding weight, heat distribution, and maintenance.
Distribution on the Bike
The right distribution of your gear on the bike is crucial for a good riding feel. You should store heavy items in the frame bag. The center of gravity remains low there, and the handling is stable. Light items like clothing or a sleeping bag belong in the handlebar bag or saddlebag. This keeps your bike agile, and you have important things quickly at hand.
Heavy equipment goes into the frame bag.
Pack light items into the handlebar bag or saddlebag.
Balanced weight distribution ensures that your bike rides well even over long distances.
Your tour planning influences how you pack. Choose a route that fits your fitness level. Consider which sights or experiences you want to include along the way. A good overview helps you pack your bike optimally. Bikepacking bags fit any bike. You don't need special eyelets or mounts. This makes bike packing flexible and suitable for almost every bike.
Note: Test your loaded bike on a short route before the tour. You will quickly notice if the distribution is right and if you need to repack anything.
With a well-thought-out selection and distribution of your gear, you will start your bike packing adventure feeling relaxed.
Bags and Attachment
Types of Bags
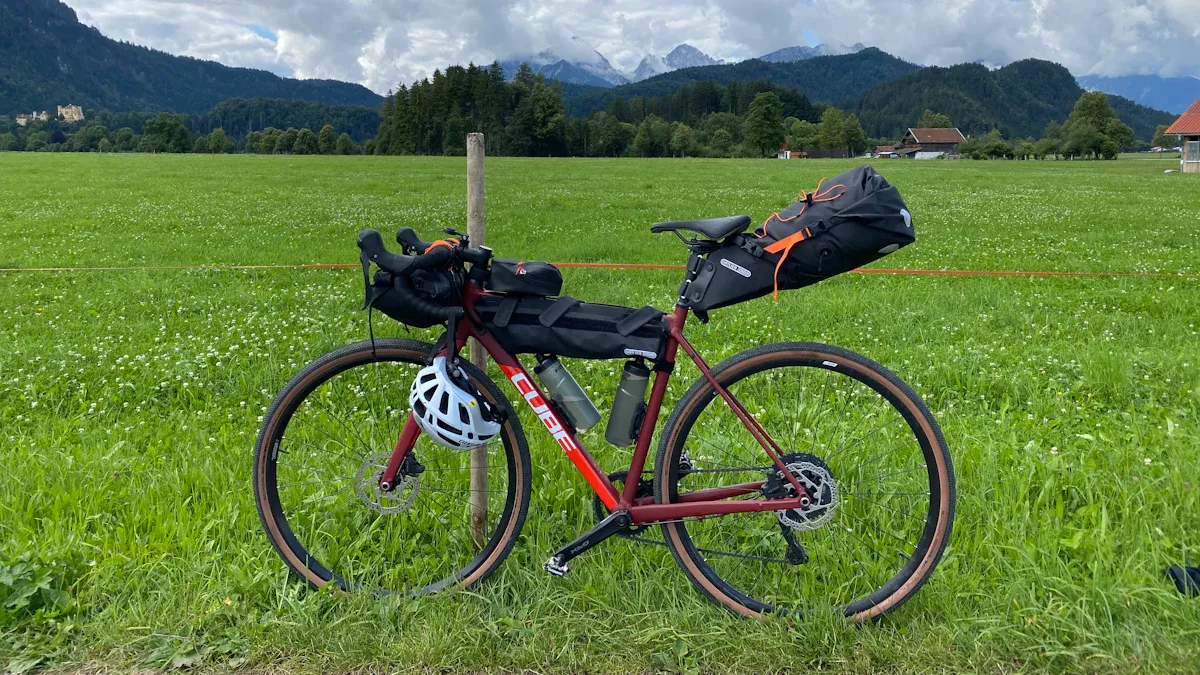
When bike packing, you have various bags to choose from. Each bag has its own purpose and place on the bike. The most important bag types are:
Saddlebags
Frame bags
Top tube bags
Handlebar bags
Fork bags
Backpacks
You attach these bags directly to the bike. This keeps your bike agile and the center of gravity low. You can find these bags in many sizes and shapes, allowing you to adapt them to your tour and your needs.
The requirements for bags differ depending on the tour. In the city, you often need less space. For longer trips, you need more storage space. The following table shows the differences:
Type of bag |
Size/Volume |
Usage |
|---|---|---|
Urban bags |
2 to 10 liters |
For everyday items |
Long-distance bikepacking bags |
Up to 19 liters |
For multi-day tours with a tent, sleeping bag, stove |
Tip: Choose bags that suit your route. For short rides, a small frame bag is often enough. For long adventures, you need more volume.
Attachment Systems
A secure hold is very important in bike packing. Your bags must not come loose or shift. Especially on uneven paths, you need a vibration-resistant fit.
Stiftung Warentest has tested various bags. The best models were the Ortlieb Back-Roller and the Vaude Augsburg III.
These bags offer you high water resistance and remain dry even in the rain.
Look for sturdy Velcro fasteners, hooks, or click systems. They ensure your equipment stays firmly on the bike.
Test the attachment before your tour to ensure everything is secure so you can start in a relaxed state.
Packing Techniques and Checklists
Packing Order
A good packing order helps you quickly get to important things while on the road. You should sort your gear so that you don't have to search for long. Experienced bikepackers recommend filling bags according to weight and frequency of access.
Here is a proven order for packing:
Frame bag: Pack heavy and compact items like cooking gear, tools, or tent poles here. The bag is positioned centrally, ensuring a low center of gravity.
Handlebar bag: Store lighter equipment like a tent or sleeping pad here. The bag remains handy and barely affects steering behavior.
Saddlebag: Medium-weight luggage like a sleeping bag or clothing fits well in the saddlebag.
Top tube bag: This bag is suitable for everything you need while riding. You have snacks, a phone, or maps within reach at all times. You can even open it with one hand.
Fork bag: Use it for an extra water bottle or your cooking set.
Backpack: If you want to carry more water or snacks, a small backpack is suitable.
Tip: The lower frame bag with two separate compartments offers quick access and protects the contents from water.
With this order, you will find everything quickly and keep your bike balanced.
Checklists
Checklists help you not to forget anything. You can adapt them to your tour. For a day trip, you need less equipment than for a multi-day journey. Write a list of all important items before every tour and check off each point while packing.
Here is an example of a checklist:
Category |
Examples |
|---|---|
Tools |
Multitool, repair kit, pump |
Provisions |
Snacks, water, stove |
Clothing |
Rain jacket, change of shirt, hat |
Sleeping |
Sleeping bag, sleeping pad, tent |
Navigation |
Phone, maps, power bank |
Emergency |
First-aid kit, spare parts |
Note: Adapt your checklist to the weather, route, and duration of the trip to ensure you are always well-prepared.
Staying Organized on the Road
It is easier to stay organized on the road if you organize your bags cleverly. Mark your panniers with stickers. This way, you always know what is inside. Divide the contents into small stuff sacks. This helps you find the right item quickly and saves time when packing and unpacking.
Mark each bag with a symbol or color.
Use small stuff sacks for clothing, tools, or food.
Always put important items in the same place.
Tip: Quickly check your gear after every stop so you don't lose anything and stay organized.
With these techniques, bike packing becomes clear and relaxed. You can find everything quickly and focus on the ride.
Bike Packing Safety
Theft Protection
You protect your bike best by remaining attentive and following a few simple rules. In large cities, the risk of theft increases. Many cyclists feel safer when taking precautions. Here you will find the most important tips to secure your bike and your equipment:
Never leave your bike unattended.
Place the lock as high as possible.
Wrap the lock tightly around the wheel and frame.
Ensure that the locking cylinder is difficult to access.
Avoid quick-release skewers in the city.
Do not lock your bike in isolated areas.
Secure easily stolen parts with an extra lock.
Vary where and when you park so you remain unpredictable.
Lock your bikes together in groups when on the road.
Use guarded bicycle parking facilities if possible.
Lock your bike at home as well.
Increase the recognition value of your bike, for example, with stickers.
Tip: A short packing strap can help to further secure the bike.
Weather Protection
You should always be prepared for changeable weather. The right preparation protects you and your equipment from rain and cold. Experienced bikepackers recommend checking the weather forecast before every tour. This allows you to pack suitable clothing and sleeping gear.
Use waterproof bags so that provisions and clothing remain dry.
Additionally, pack sensitive equipment in plastic bags.
Wear protective gear like a helmet, gloves, and glasses.
Rain and cold protection are often indispensable.
Note: With good planning, you avoid wet clothing and soaked equipment.
Breakdown Assistance
You can significantly reduce the risk of breakdowns by riding with foresight. Reduce your speed on poor paths. Remain calm if a breakdown does occur. This prevents further damage.
Ride with foresight and slowly to avoid breakdowns.
In case of a breakdown, remain calm and check your bike carefully.
Always carry spare parts like inner tubes, a repair kit, and a pump.
Tip: With a small tool bag, you will feel safer on every bike packing tour.
Provisions and Emergency
Snacks and Water
You need enough water and energy on every bikepacking tour. Water is particularly important because you sweat a lot while cycling. Even at normal temperatures, you should drink 0.5 to 0.75 liters per hour. In heat, the requirement increases to 1 to 1.5 liters per hour. You need an additional 2 to 3 liters for cooking and washing in camp. A reserve of 1 liter gives you peace of mind.
Conditions |
Water Requirement |
|---|---|
Bikepacking at normal temperatures |
0.5–0.75 liters/hour |
Bikepacking at high temperatures |
1.0–1.5 liters/hour |
Supplies (cooking, washing) |
2.0–3.0 liters |
Reserve |
1.0 liter |
You should drink small amounts every 15 to 20 minutes, about 150 to 250 ml. Use water bottles on the frame or a hydration system in your backpack. Refill your water regularly, especially on long routes. Snacks like nuts, muesli bars, or dried fruit provide quick energy and fit into any bag.
Tip: Plan your route so that you can refill water along the way. In hot regions, you will need a larger supply.
Emergency Kit
A good first-aid kit should always be part of your luggage. It allows you to quickly treat minor injuries. Experts recommend the following equipment:
Quantity |
|
|---|---|
Emergency blanket |
1 |
Large wound dressing |
1 |
Small wound dressing |
1 |
Gauze bandage |
1 |
Ointment dressing |
1 |
Disposable gloves |
2 |
Plasters |
4 |
Resuscitation mask |
1 |
Disinfectant |
1 |
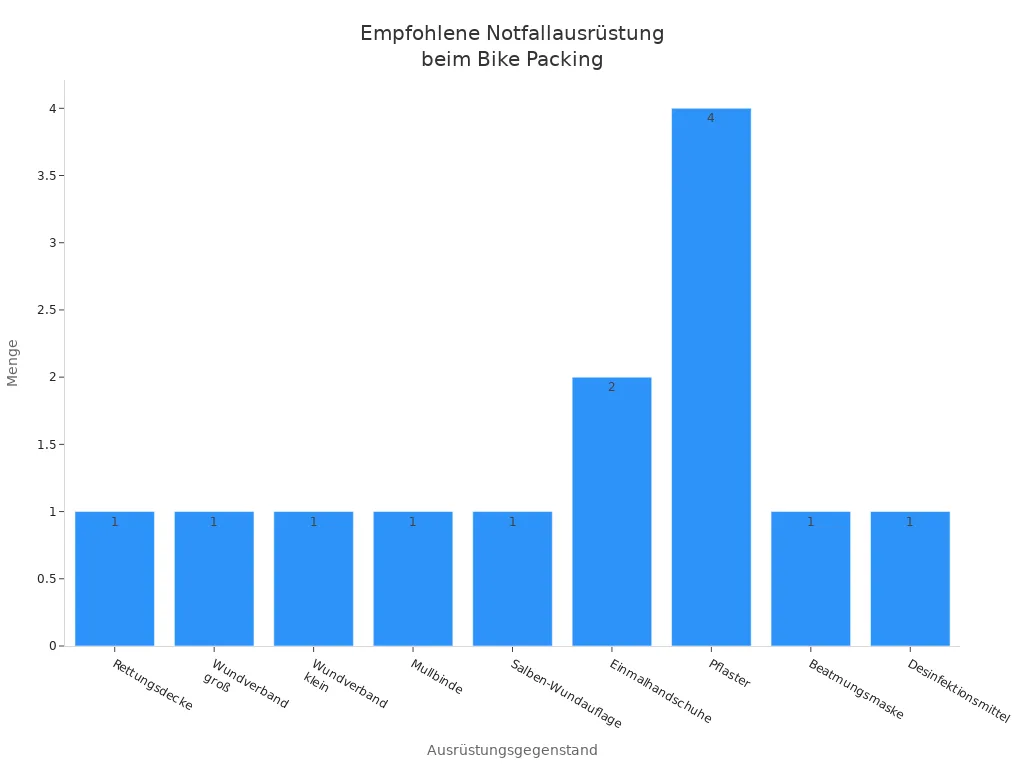
Additionally, pack scissors, tweezers, adhesive tape, sterile compresses, and a signal whistle. This way, you are prepared for many situations.
Energy Management
You maintain your energy best by eating and drinking regularly. Plan enough food for every day. Choose snacks that are easy to digest and provide quick energy. Stick to foods that you tolerate well. Always refill water and food in good time. Pay attention to breaks so that you can recover. With good planning, you will stay fit and reach your destination safely.
Tip: Never start without breakfast and eat small portions throughout the day. This keeps your energy level stable.
Routines and Tips
Before the Tour
Good preparation makes your bikepacking tour safer and more pleasant. Many experienced cycle travelers recommend reducing your luggage to the absolute minimum. This keeps your bike light and makes it easier to ride. For an overnight stay outdoors, minimal equipment is often enough. A sleeping bag, a sleeping mat, and a small stove fit into several bags.
Before you start, you should check your bike thoroughly. Check the brakes and the gears. Reflective elements and bright colors on your bike increase your visibility. Pack a first-aid kit and learn how to use it. Modern crash sensors can automatically call for help in an emergency.
Tip: Test your setup on a short test ride. This way, you will quickly find out if everything fits and works properly.
On the Road
During the tour, a good routine helps you stay relaxed. Plan your route in detail. This allows you to avoid surprises and respond better to obstacles. Pay attention to the weather and the terrain. Adapt your equipment to the conditions. Always pack minimalist to avoid overloading.
Secure your luggage with compression straps or tie-down straps.
Regularly test whether everything is securely fastened.
Drink and eat regularly to maintain your energy.
Note: Schedule breaks so you can recover. Listen to your body and give yourself rest when you need it.
Avoiding Mistakes
Many mistakes are easy to prevent. Always check the weather forecast before you start. Set yourself realistic goals and do not overestimate your daily kilometers. Do not forget important equipment like a first-aid kit, tools, and spare parts. Save offline maps for areas without internet access. Choose a safe place to sleep and pay attention to your seating position.
Increase your workload slowly to avoid injuries.
Test your saddle and shoes before the tour.
Always take patch kits and tools with you.
Tip: Listen to your body's warning signs. You should take pain seriously to avoid long-term damage.
You now have many tips for your bikepacking adventure. Remember these important points:
Choose suitable routes. Start with 60 to 80 kilometers per day.
Use padded cycling shorts, chamois cream, a helmet, and rain gear.
Drink regularly and eat enough.
Ensure good lighting, especially at night.
Plan for campsites, as wild camping is prohibited in Germany.
Enjoy every ride and stay relaxed.
With these routines, you develop mental strength and master every challenge. Every completed stretch gives you motivation for the next tour. 🚴♂️
FAQ
What is the maximum weight I should carry when bike packing?
You should not carry more than 20% of your body weight. Less weight makes riding easier and safer. Test your loaded bike before the tour. This way, you find the best balance for yourself.
Which bags are best for beginners?
Frame bags and saddlebags offer a good start. They are easy to attach and fit almost any bike. You can combine them flexibly. For short tours, one bag is often enough.
Do I have to use special equipment for city trips?
For city trips, a small selection of equipment is often sufficient. Usually, you don't need camping gear. A waterproof bag for valuables and a good lock are often enough.
How do I keep my equipment dry on the road?
Use waterproof bags or protect sensitive items with zip-lock bags. Check all fasteners before departure. In heavy rain, an additional rain cover helps.
What should I do if I have a breakdown on the road?
Always pack a multitool, patch kit, and a small pump. This allows you to solve many problems yourself. Practice repairing before the tour. This way, you stay relaxed on the road.